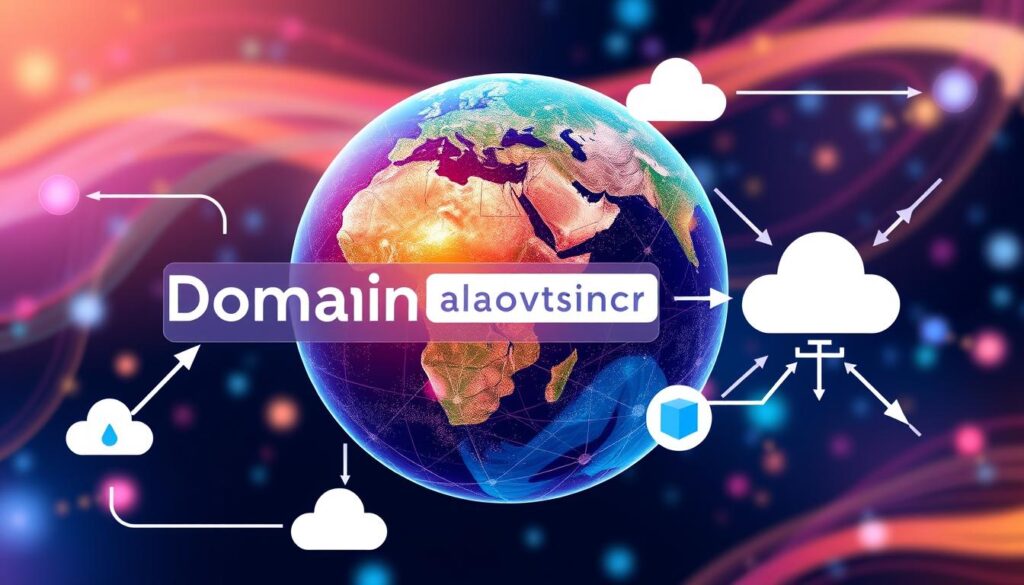
Connect Your Domain with Hostinger Hosting: Step-by-Step Guide
Connecting your domain with Hostinger hosting is easy. You just need to know the basics of domain hosting. Hostinger is a top choice for web hosting, known for its speed and security. By choosing Hostinger, you get a smooth and efficient hosting experience.

This article will guide you through connecting your domain with Hostinger hosting. We’ll talk about why Hostinger is great for domain hosting. And we’ll show you how to connect your domain to Hostinger, step by step. This guide is for everyone, whether you’re new or experienced.
Introduction to Domain Connection
Before we start, let’s talk about why connecting your domain is important. It makes sure your website is always up and running for your visitors. We’ll cover the benefits of using Hostinger for your domain hosting.
Key Takeaways
- Connect your domain with Hostinger hosting for fast and secure hosting
- Understand the basics of domain hosting connection
- Choose Hostinger for reliable and efficient hosting experience
- Follow a step-by-step guide to connect domain to Hostinger
- Enjoy seamless and efficient hosting experience with Hostinger
- Connect domain with Hostinger hosting for improved website performance
Understanding Domain Connection Basics
Connecting your domain to a hosting service is key for an online presence. This step links your domain to Hostinger, letting you manage your site’s content and emails. You can use domain mapping with hostinger to point your domain to Hostinger’s servers easily.
Choosing a good hosting provider is vital. Hostinger offers reliable uptime, fast speeds, and strong security. It’s perfect for domain setup on hostinger. With Hostinger, you get a smooth domain connection experience thanks to their easy control panel and support.
What is Domain Connection?
Domain connection links your domain name to a hosting service. This lets you create and manage your website. You can set up DNS settings manually or automatically, depending on your choice.
Why Choose Hostinger for Domain Hosting?
Hostinger has many benefits like good prices, reliable service, and great support. Their domain connection process is simple. They also offer tools and resources to help manage your domain and website.
Domain Connection Methods Overview
There are automatic and manual DNS configuration methods to connect your domain to Hostinger. Automatic is quick and easy, while manual gives more control. Hostinger’s support team is ready to help with any questions or problems.
Knowing the basics of domain connection and picking a reliable host like Hostinger is key. Whether you’re new or experienced, Hostinger’s tools make managing your domain and website easy. This lets you focus on creating a great online presence.
| Domain Connection Method | Description |
|---|---|
| Automatic DNS Configuration | Quick and easy method, ideal for beginners |
| Manual DNS Configuration | Provides more control over the configuration process |
Essential Prerequisites Before Starting
To make sure your hostinger domain hosting integration goes smoothly, you need to prepare a few things first. You must have a Hostinger account and a domain name. Also, knowing how to set up DNS is key for a good domain and hostinger hosting synchronization.
Before you start, make sure you have:
- A registered domain name
- A Hostinger account
- Basic knowledge of DNS configuration
Meeting these requirements helps avoid problems and makes connecting your domain to Hostinger easier. Remember, hostinger domain hosting integration needs careful planning and attention to detail for a successful domain and hostinger hosting synchronization.
In the next part, we’ll show you how to get into your Hostinger control panel. This is a key step in linking your domain to Hostinger hosting.
| Prerequisite | Description |
|---|---|
| Hostinger Account | A valid Hostinger account is required for domain connection |
| Registered Domain Name | A registered domain name is necessary for hosting integration |
| DNS Configuration Knowledge | Basic understanding of DNS configuration is essential for successful integration |
Accessing Your Hostinger Control Panel
To manage your domain with Hostinger, first, you need to get into your control panel. This is a key step in setting up your domain. The control panel has a simple interface to handle your domain and hosting.
After logging in, you’ll see the dashboard. It’s easy to use and has all the tools you need. You can search for specific features or tools quickly.
Logging into Your Account
To log in, just enter your username and password. If you forgot your password, use the forgot password feature. Choose a strong, unique password to keep your account safe.
Navigating the Dashboard
The dashboard is split into sections for different features. Use the menu on the left to find what you need. It links to areas like domain management, hosting, and billing.
Finding Domain Management Tools
To manage your domain with Hostinger, look for the domain management tools. These let you set up your domain settings, like DNS records and nameservers. You’ll find these tools in the domain section of the dashboard.
Here’s how to get to your Hostinger control panel:
- Log into your account with your username and password
- Explore the dashboard to find the tools you need
- Look for the domain management tools to set up your domain
By following these steps, you can easily get to your Hostinger control panel. This lets you manage your domain connection and set up your Hostinger domain.
| Step | Description |
|---|---|
| 1 | Log into your account |
| 2 | Navigate the dashboard |
| 3 | Find the domain management tools |
How to Connect Domain with Hostinger Hosting
To link your domain with Hostinger hosting, you have two options. You can choose automatic connection or manual DNS setup. Automatic connection is easy and needs little technical skill. Manual DNS setup gives you more control but requires a good grasp of DNS settings.
When you setup domain with Hostinger, you’ll need to link domain to Hostinger through the control panel. This involves changing your domain’s nameservers or DNS records to point to Hostinger’s servers. The hostinger domain integration process is designed to be simple, with clear steps and help if you run into problems.

- Accessing your domain registrar’s control panel
- Updating your domain’s nameservers or DNS records
- Verifying your domain ownership
By following these steps, you can connect your domain with Hostinger hosting. This lets you start building your online presence. Make sure to carefully follow the setup to ensure a smooth hostinger domain integration.
Managing Domain Name Servers
When you link your domain to web hosting, managing domain name servers (DNS) is key. DNS settings are vital for making sure your domain connects right to your hosting. To connect domain to web hosting, you must set up your DNS settings right.
A domain and hosting setup needs careful thought about DNS management. Hostinger makes it easy to handle your DNS settings. This means setting up DNS records like A records, CNAME records, and MX records.
Here are some important things to think about for managing domain name servers:
- Set up DNS settings correctly to avoid connection problems
- Use a reliable DNS management service, such as Hostinger
- Keep your DNS records up to date for accuracy
By following these tips, you can make sure your domain links up right with your web hosting. This way, your website will be easy for people to find. Always put DNS management first when setting up your domain and hosting setup to avoid any issues.
Configuring DNS Records Properly
To connect your domain to Hostinger hosting smoothly, you need to set up DNS records right. This means creating A records, CNAME records, and MX records for email. Doing this lets you point domain to Hostinger and set up domain mapping on Hostinger. This makes your website work as it should.
It’s important to know about the different DNS records and what they do. A records link a domain to an IP address. CNAME records link a subdomain to another domain or subdomain. MX records help send email to the right server.
- Log in to your Hostinger control panel and go to the DNS management section.
- Create a new A record and enter the IP address of your Hostinger server.
- Set up a CNAME record to map your subdomain to the desired domain or subdomain.
- Configure MX records to route email messages to your email server.
By following these steps and setting up your DNS records correctly, you can make sure your domain is point domain to Hostinger right. This enables domain mapping on Hostinger. Your website will then work well and efficiently.
Domain Propagation Process
After linking your domain to Hostinger hosting, it’s key to know about the domain propagation process. This step updates the Domain Name System (DNS) records to Hostinger’s servers. It makes sure your website is live for your audience quickly.
The time it takes for domain propagation varies. It can be from 15 minutes to 48 hours. This depends on your domain registrar and DNS provider. While waiting, your site might not work or show an error. Use online tools like DNS propagation checkers to see how it’s going.
Here are some important things to remember during this time:
- Wait for the DNS records to update
- Check the domain propagation status using online tools
- Verify that your website is accessible and functioning correctly
With Hostinger, you get fast and reliable domain propagation. This means your website will be live for your audience fast. If you run into problems, Hostinger’s support team is ready to help.
SSL Certificate Implementation
Connecting your domain with Hostinger hosting means you need a secure connection. An SSL certificate is key for this. It verifies your website’s identity and encrypts data between your site and users.
Hostinger hosting offers both free and custom SSL certificates. This makes it simple to secure your domain with a reliable host.
Free SSL Installation
Getting a free SSL certificate is easy. Just follow these steps:
- Log in to your Hostinger control panel
- Navigate to the SSL manager section
- Click on the “Install free SSL” button
- Follow the prompts to complete the installation process
Custom SSL Configuration
For a custom SSL, buy one from a trusted provider and set it up with Hostinger. Here’s how:
- Purchase an SSL certificate from a trusted provider
- Generate a certificate signing request (CSR) on your Hostinger control panel
- Submit the CSR to the SSL provider and obtain the SSL certificate
- Install the SSL certificate on your Hostinger account
SSL certificates make your domain hosting secure. With Hostinger, you can easily secure your domain. Choose from a free SSL or a custom one for more security.
| SSL Certificate Type | Features | Benefits |
|---|---|---|
| Free SSL | Automatic installation, 90-day validity | Easy to install, free of charge |
| Custom SSL | Manual configuration, 1-year validity | High-level security, customizable |
Common Connection Issues and Solutions
When you connect your domain with Hostinger hosting, you might face some problems. These issues can be annoying, but most have easy fixes. One common problem is DNS propagation issues, which can happen during the integration process.
Another issue is nameserver errors. These can be fixed by checking your domain and hosting settings. Connection timeouts can also occur. But, these can usually be solved by checking the server status and making sure your domain is set up right.
To solve these problems, try these steps:
- Check the DNS propagation status to ensure it is complete
- Verify the nameserver settings to ensure they are correct
- Restart the server or contact Hostinger support for assistance
By following these steps, you can make sure your hostinger domain hosting integration goes smoothly. This way, you can enjoy reliable and secure hosting.
| Issue | Solution |
|---|---|
| DNS Propagation Problems | Check DNS propagation status |
| Nameserver Errors | Verify nameserver settings |
| Connection Timeout Issues | Restart server or contact support |
Domain Transfer to Hostinger
Transferring your domain to Hostinger is easy and quick. First, unlock your domain and get the transfer code from your current registrar. This code is key to start the transfer smoothly.
With the transfer code in hand, you can start the domain connection for hostinger process. Just submit a transfer request in the Hostinger control panel and wait. The whole process usually takes a few days, and your site might be down briefly.
To avoid downtime, make sure your hostinger domain setup is right. Set up your DNS records and update your site to point to the new server. These steps help ensure a smooth transfer and let you enjoy Hostinger’s reliable hosting.
- Reliable and secure hosting services
- Easy hostinger domain setup and management
- Fast and efficient domain connection for hostinger process
Transferring your domain to Hostinger offers many benefits. You get a hassle-free hosting experience. Hostinger’s user-friendly control panel and great customer support make managing your domain and site easy, ensuring a strong online presence.
Security Measures for Domain Connection
When you set up a domain with Hostinger, security is key. To keep your domain safe, you need to take extra steps. One important step is using domain lock features. These features stop anyone from changing your domain settings without permission.
Domain Lock Features
Domain lock features are a must when linking your domain to Hostinger. They stop your domain from being moved to another registrar without your okay. This adds a strong layer of security to your domain connection, giving you peace of mind.
Two-Factor Authentication
Two-factor authentication is another key security step. It makes logging in harder for unauthorized users. By turning on two-factor authentication, you protect your domain connection even more. This ensures only those you trust can change your settings.
By taking these steps, you make sure your domain connection is safe. Whether you’re starting with a new domain or moving an old one, security is vital. It helps avoid any problems.
| Security Measure | Description |
|---|---|
| Domain Lock Features | Prevent unauthorized changes to your domain settings |
| Two-Factor Authentication | Add an extra step to your login process for increased security |
Managing Multiple Domains
Managing multiple domains can be tough. But with Hostinger, it’s easy to connect each domain to web hosting. This guide will show you how to manage your domains with Hostinger.
To manage multiple domains, you need to connect each one to web hosting. Here’s how to do it:
- Connect each domain to web hosting using the Hostinger control panel.
- Set up domain and hosting for each domain, including DNS records and email settings.
- Use the Hostinger domain management tools to manage all your domains in one place.
By following these steps, managing multiple domains with Hostinger is easy. The process of connecting domain to web hosting and setting up is simple. Hostinger gives you all the tools you need.
With Hostinger, your domains are always safe and reliable. They offer many hosting plans, like shared, VPS, and dedicated hosting. Choose the right plan for your needs to keep your domains secure.
| Hosting Plan | Features | Price |
|---|---|---|
| Shared Hosting | Domain and hosting setup, DNS records, email settings | $2.99/month |
| VPS Hosting | Domain and hosting setup, DNS records, email settings, dedicated IP | $9.99/month |
| Dedicated Hosting | Domain and hosting setup, DNS records, email settings, dedicated IP, dedicated server | $49.99/month |
Managing multiple domains with Hostinger means your sites are safe and reliable. They have many hosting plans to fit your needs. Connecting domain to web hosting and setting up is easy with Hostinger.
Domain Connection Maintenance Tips
To keep your domain connection stable and secure, regular maintenance is key. With domain mapping on hostinger, you get reliable and secure hosting. Plus, the support team is ready to help with any issues.
Here are some tips for maintaining your domain connection:
- Update your DNS records to point domain to hostinger and make sure they’re set up right.
- Keep an eye on your domain’s propagation to make sure it’s working as it should.
- Use security steps like two-factor authentication to keep your domain safe from unauthorized access.
By following these tips, you can keep your domain connection stable and secure. This way, you can enjoy the perks of domain mapping on hostinger. Always point domain to hostinger for their reliable and secure hosting services.
It’s also important to keep your domain registration info current. Watch your domain’s expiration date to avoid problems. This ensures a smooth and secure domain connection experience.
Conclusion
Connecting your domain with Hostinger hosting is easy. Hostinger’s reliable setup and tools make it simple to link your domain. This way, you can build a strong online presence.
Hostinger has many domain hosting options for everyone. Their fast and reliable hosting means your site will work well for visitors. They help you set up or move your site smoothly.
Keeping your domain safe is key. Hostinger has strong security like domain lock and two-factor auth. These features protect your online stuff. Follow Hostinger’s tips to keep your site safe and running well.
Start your online journey with Hostinger as your partner. They help you manage your domain so you can focus on your brand and goals. With Hostinger, you don’t have to worry about the technical stuff.
FAQ
What is domain connection?
Domain connection links your domain name to a web hosting service. This makes your website available online.
Why should I choose Hostinger for domain hosting?
Hostinger provides fast, secure, and reliable hosting. It includes free SSL certificates and easy domain management tools.
What are the prerequisites before connecting my domain with Hostinger?
You need a Hostinger account and your domain name. Also, you should know about DNS configuration.
How do I access the Hostinger control panel to manage my domain?
Log into your Hostinger account. Then, go to the dashboard. You’ll find tools to manage your domain there.
What are the methods for connecting my domain with Hostinger hosting?
Hostinger offers automatic and manual DNS configuration. These methods connect your domain to their hosting.
How do I properly configure the DNS records for my domain on Hostinger?
Set up A records, CNAME records, and MX records for email. This ensures your domain connects to Hostinger hosting.
What is the domain propagation process, and how long does it take?
Domain propagation updates DNS servers with your new hosting info. It can take 24-48 hours to complete.
How do I implement an SSL certificate for my domain on Hostinger?
Hostinger offers free SSL certificates. You can also install a custom SSL certificate for security.
What are some common domain connection issues, and how can I solve them?
Issues include DNS problems and connection timeouts. Hostinger’s support team can help fix these problems.
How do I transfer my domain to Hostinger?
Hostinger makes transferring your domain easy. This ensures a smooth transition to their hosting.
What security measures can I take to protect my domain connection?
Hostinger offers domain lock features and two-factor authentication. These enhance your domain’s security.
How can I manage multiple domains with Hostinger?
Hostinger allows easy management of multiple domains. This streamlines your online presence.
What are some tips for maintaining my domain connection with Hostinger?
Monitor your DNS settings and renew your domain on time. Also, work with Hostinger’s support team for a stable connection.
